So much happened since I last posted and that was a while ago! For everyone who logs on and checks in on what is happening on my blog still…THANK YOU! And apologies there has been nothing new posted. Behind the scene though, I’ve had so many orders to fulfill, and in Jan 2019 I moved to Sydney..WOAH!!! So clearly the last one year and more has been crazy with a move with my 2 little witches, getting their schooling sorted and settling into work myself and trying to continue to keep The Bakery Witch afloat. My commute from 20minutes to work has turned into 90mins one way, so it’s a complete nightmare for me to find any time outside work, kids, home and no hired help (luxuries of Singapore life) to feed this blog and give it its due. Sadly, with the COVID-19 taking the world by storm, while the situation is dire it has given many of us opportunities to pick up stuff we weren’t able to do before, connect more with family all around the world and just reflect on the more important things in life. Hope everyone is staying safe, would love to hear how everyone is coping and if anyone wants any baking inspirations.
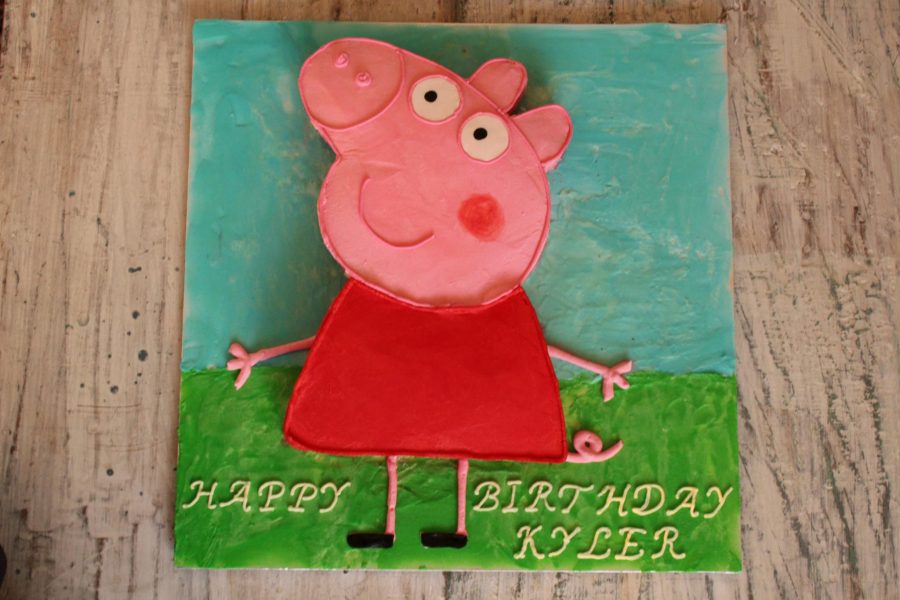
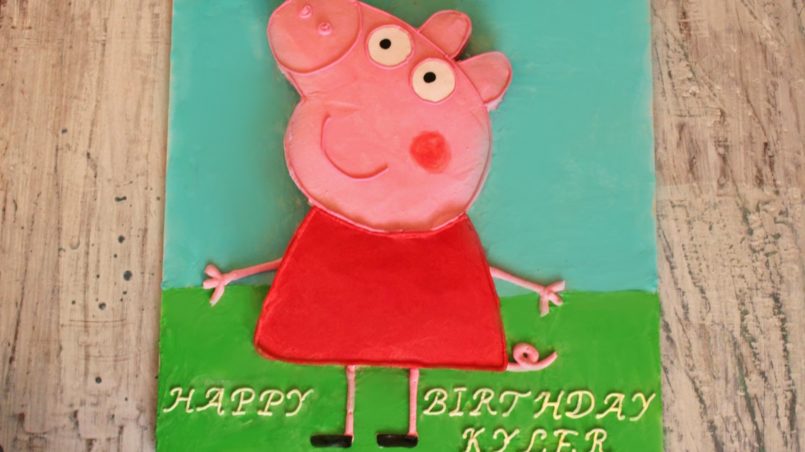
For today’s post I want to pick up where I left off as it feels like unfinished business. It was the last of the Peppa pig cake orders that I was meant to share and didn’t get around to before the move happened. It’s HUGE improvement from the 1st Peppa cake I made for my daughters school celebration. Thank God she was younger and a bunch of 5 year olds didn’t care about how perfect the cake looked and post lunch time just wanted some sugar! It still tasted great which is key, but now on to prettier looking cakes. From the fist cake made in Feb 2017 this post comes more than 3 years later with a new version of the Peppa cake.
So here’s what you need
-
- 1 12x 12 inch chocolate cake or vanilla. I’ve used a 12 inch cake to meet the party size, you can use smaller or bigger size but best to have a square or rectangle so you can cut Peppa’s shape out
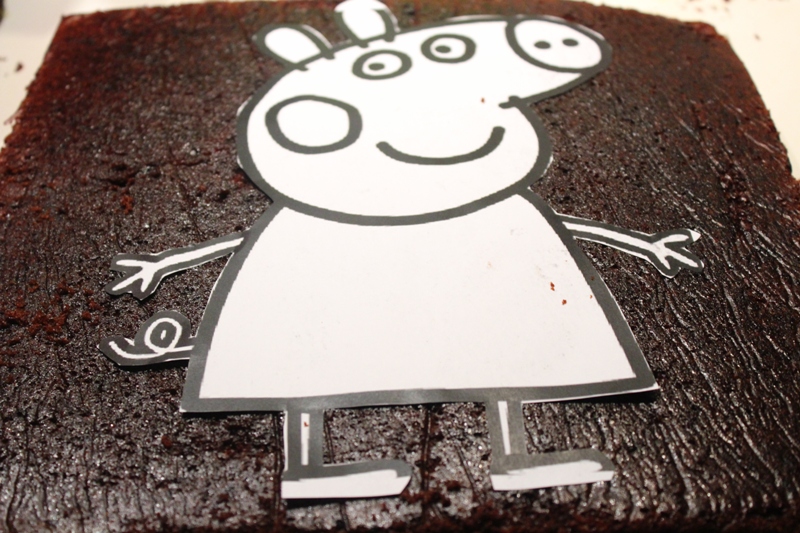
- 1 print out template of Peppa (https://eng.ohmyfiesta.com/2018/12/peppa-pig-free-printable-centerpieces.html) this is an A4 size which you can re-size to A3, resolution should not matter as its just a template to cut the shape of the cake
- Red, pink, green and sky blue food colour
- Butter cream frosting (this will depend on the size of the cake you make, because this is a one layer cake that is 12 x 12 inches I used about 4 recipes of my buttercream frosting to also cover the board. Mum didn’t want any fondant used, but if you’re okay with fondant use blue and green fondant for the board and it’ll give it a better finish
- Cakeboard size 14x 14 inches
- If using fondant for any of the finish then you’ll need, blue, green, pink, white and black fondant
Directions
- Prepare your cake and cool overnight in the fridge or even freezer so its manageable to cut the Peppa template out and frost. I use my signature chocolate cake recipe here
- Prepare light pink frosting for Peppa’s face, red for her dress, green and sky blue for the background
- Start with placing Peppa template on the cake and cut her dress out only and place aside
- Then cut Peppa’s head (this sounds so gruesome😝) template, this should be 2 pieces it is easier to frost and assemble then
- Put back the pieces in the fridge to cool down, its really important that the cake stays cool because you want to frost Peppa smoothly and give it a nice finish
- Put a layer of green frosting for the gras and cover a quarter of the board, if using fondant cut out green fondant and stick to board, then do the same for the sky frosting
- Next start frosting peppa’s dress with a layer of crumb coating, pop in fridge for 30mins to set
- Crumb coat the face and ears next – IF it helps, cut off the ears and frost separately and attach later, it does make it easier. Set in fridge for 30mins
- After 30mins take the dress out and apply a thick layer of red frosting for a smooth red finish. Place on the center of the board leaving enough space to pipe the legs and feet. Once placed, use a Wilton Tip 5 to pipe the border on the dress for a finished look
- Next, frost the head with a thick layer for a smooth finish, place above the dress. Do the same for ears and place above the head
- Use the same pink frosting and using a Wilton Tip #9 pipe the arms ,legs and tail. You are now done with all the pink frosting you need
- Now that all the pink frosting that needs to be used has been completed add just a little bit of pink food colour to the existing pink frosting for a darker pink to outline Peppas face, ears, nose, smile and nostrils
- For the eyes, IF you want, you can use buttercream, but fondant gives the smoothest best finish, so use the template and cut eyes out place on Peppa’s head
- Next use black fondant and cut two smaller circles for eyes, and using the template cut the shoes out as well. For the eyes you can always use a wilton Tip #12 or smaller depending on the size of the cake
- Place the eyes and feet and Peppa has come together
- Finally, for that red blush, there are 2 ways to do this
- Take a bit of luster dust on the tip of your 3rd finger, just as you’d be applying make up to yourself
- Thin out the red frosting and use that with the tip of your finger to create a blush circle
And you’re finally done!
This was a challenge for me, if I were to do it again I would use fondant on the background to give it the smooth finish, so I would highly recommend it.