I’ve been terrible at adding my new entries for the last few months now. I’m now making a conscious effort to make sure I don’t slip. I’ve had to really push myself to bake in the last few months. I just didn’t feel like going into the kitchen and trying anything new, I’ve been down and under and this time even baking wasn’t going to help. Lucky for me, Serena’s birthday was coming up and that left me with NO choice. I had to get my chef hat on and start mentally preparing myself for it.
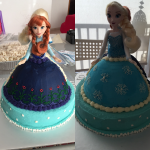
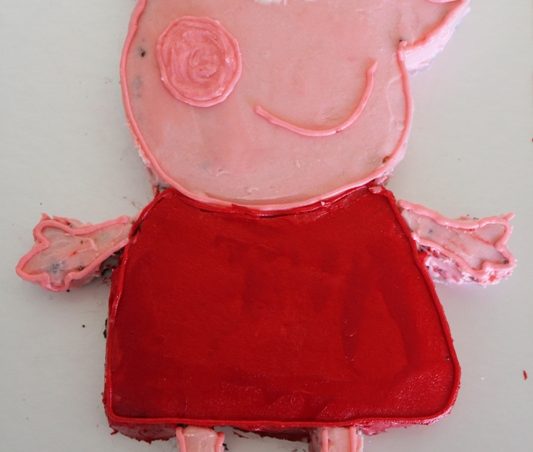
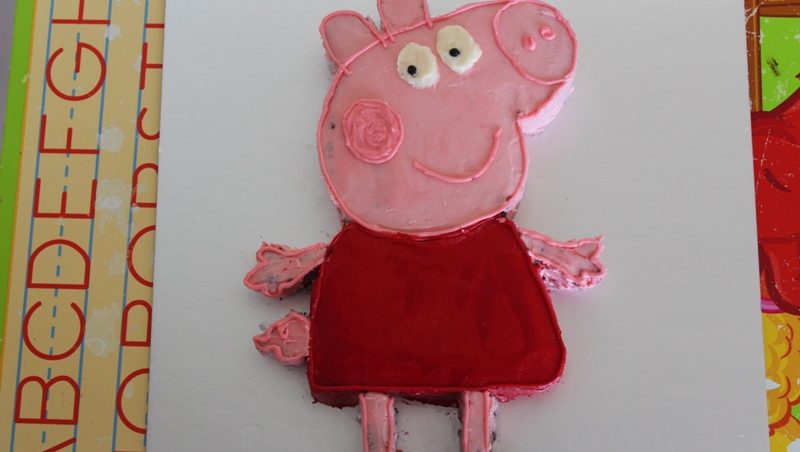
I had a few weeks still for her birthday party (frozen themed of course), but her actual birthday was falling on a Monday and it was perfect to have the school celebration. Choice of cake was Peppa Pig and Peppa pig. A bit intimidating I thought, for someone who hasn’t been baking for a few weeks and also not been able to get myself into the kitchen – literally!!! Peppa pig was literally my test piece to get back into baking. You’ll see how unrefined her legs are and I’ve tried to make do. But this helped me get back into baking when I had to take the daunting task of Frozen.
I had to feed 20 kids so I made a super large cake, you can decide on the size based on how many people you need to serve.


Instructions:
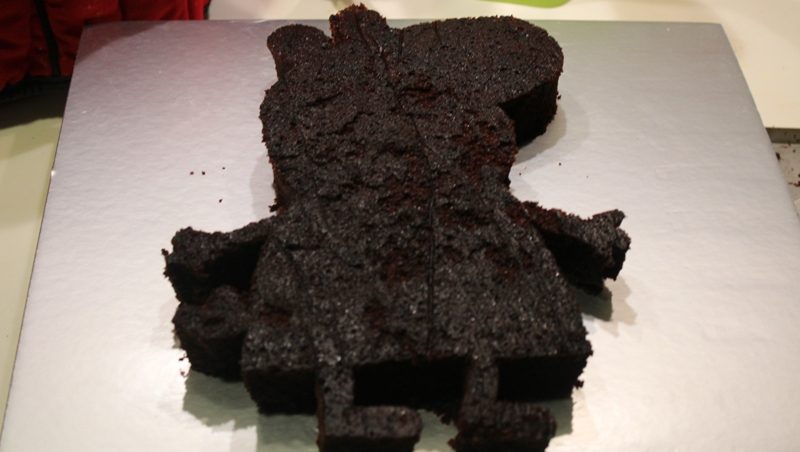
- Bake any chocolate or vanilla cake of your choice and let it cool in fridge so it becomes firm and easier to cut the shape out
- Place a Peppa Pig print out, the size of the cake and cut out
- For Buttercream frosting, I’ve used my standard Buttercream frosting recipe and split into 3 bowls for red, pink, white, leftover pink will be used to darken to make the outlines and the cheeks
- Start with crumb frosting and apply all over the cake and sides. Pop into fridge so it sets and all the crumbs have settled
- Now take a spatula and start frosting the arms, legs, tail and face. Start with the face since that is it the easiest given the large area to cover. Pop back into fridge and let it set
- Next frost the dress and pop back into fridge and set and finally once set add the eyes, cheeks and outline
- Let the frosting set in the fridge so it can come together but the serve at room temperature so the frosting can remain creamy and smooth and not clumpy